
In this article we're going to look at variables and setting custom variables.
Setting a variable will create a block within the node/branch you have added it to whereby a condition is set.
Setting a variable isn't so much an actual "block" you are adding as much as it is really a more abstract piece of information you are setting so that your bots can call those variables in other blocks you DO add into your bot. We have discussed "variables" within the context of how to use them in blocks in earlier articles.
There are 2 types of variables on Buildabot:
- System variables (preset variables provided by Buildabot).
- Custom variables (which you can create and set as required for data types you may want to collect or work with that are not provided by Buildabot at a system level).
Number 2 above is where we are going to "Set a variable".
"Set a variable" is typically used in conjunction with other blocks such as "True/false" and "If/else decision tree" which you can find in the "Advanced" category of the block builder.
Let's dive in!
TYPICAL USES FOR THIS:
- Defining a variable for use with "True/false" or "If/else decision tree" blocks.
- Providing your bot with logic that enables it to test certain inputs and/or direct users through decision trees based on the testing of those inputs against variables you have set here.
STEP 1: Add a new block.
STEP 2: Select the "Advanced" category.
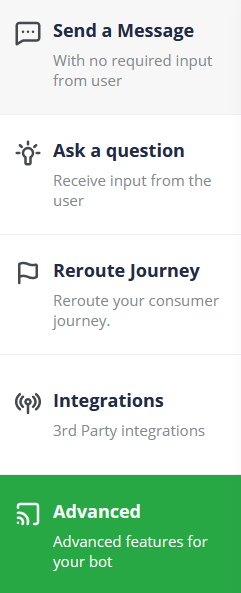
STEP 3: Select the "Set a Variable" block.
The following window will appear:
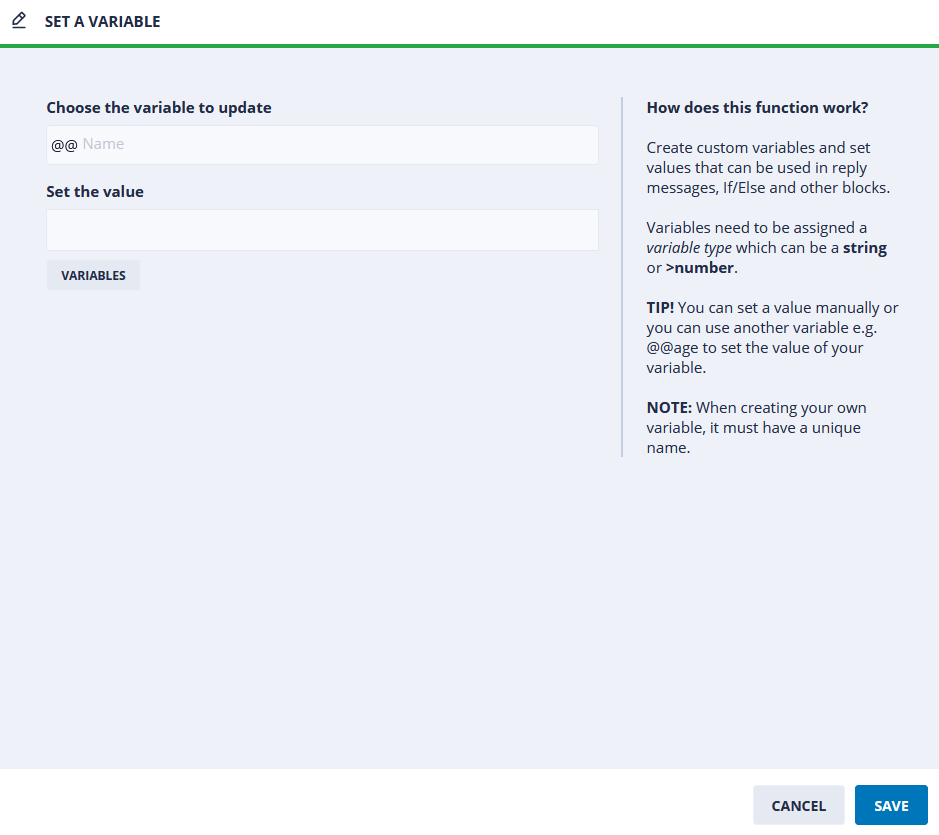
Let's explore the elements of this page.
You have a few elements with which you can interact here such as:
- Choose the variable to update
- Set the value
- Variables
Let's start with "Choose the variable to update".
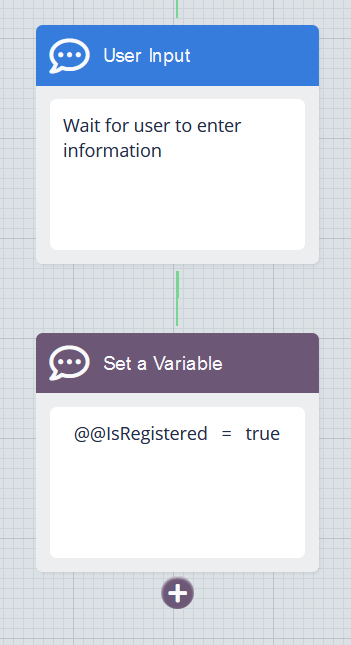
You can either select from an existing variable, or simply type in a completely new one. For this example, we are going to create a new variable called "@@IsRegistered" to use as a test to see if a user is registered with our bot.

When typing in the value, a "Create" button will appear which you can see in the image below. When clicked, it also results in the pop-up below (which is the item in active focus).
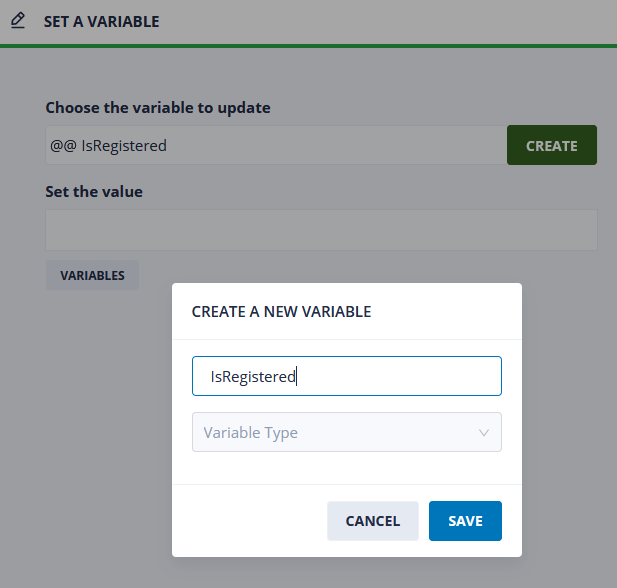
You will be prompted to set the "Variable Type" which we have discussed in a previous article. For a quick recap, there are 2 types:
- String - Will accept any type of input from alphanumeric and numeric values.
- Number - Will accept numeric values only.
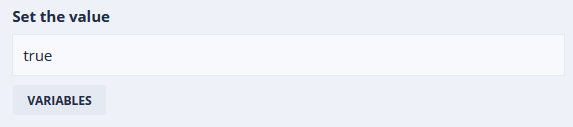
Set the value:
Here you will set the state of your variable you created. For the purpose of this example, we have set a new variable of "@@IsRegistered" - which we will set a value of "true" to.
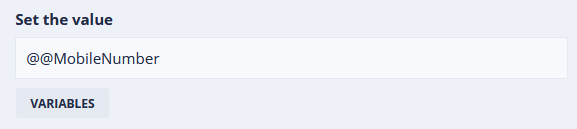
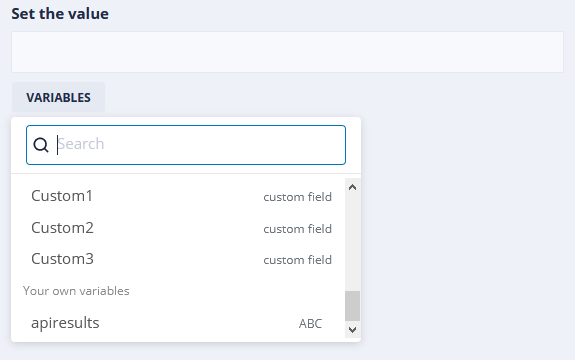
Variables:
One of the more powerful capabilities of "Set a value" is that you can use existing variables already available to you. You can therefore set your new variable to use a value from another variable. For example you may want to perform a If/else or True/false by testing whether your @@IsRegistered value has an @@MobileNumber or not.
You can simply select from the existing variables you already have.
Or, you can input your own value like the previous example above.
STEP 4: Click on "Save" to save the the variable you just set. At minimum, the following elements of this block must be completed:
- Choose a variable to update
- Set the value
Example:
.png)
Result:
Once saved, you will see your variable block will appear in your bot editor window attached to the last block onto which you added your "Set a variable" block.
From here, you can then continue building your bot by adding additional blocks taking whatever avenue you prefer.
Done! You've successfully used the "Set a Variable" block.